
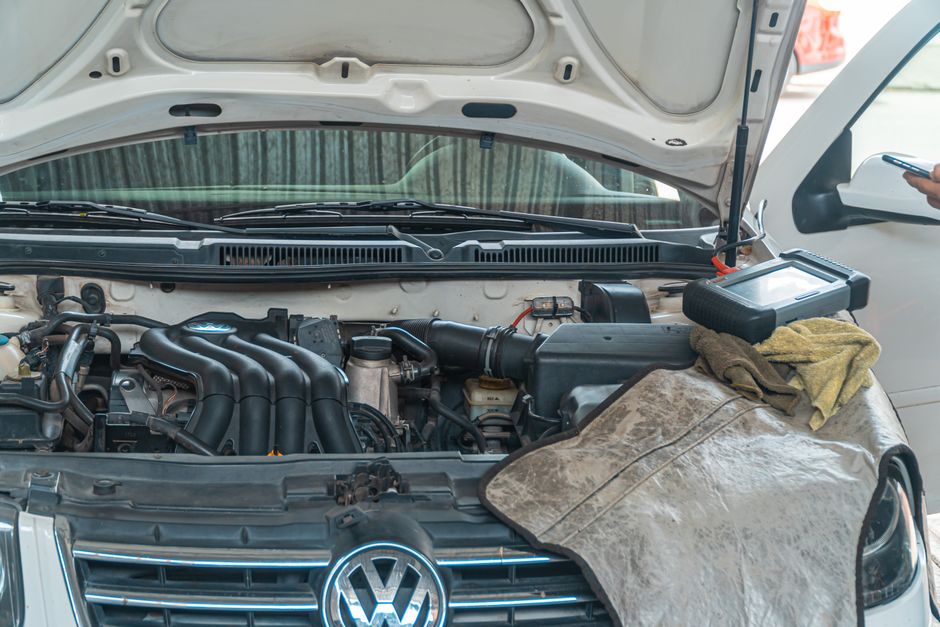
Why Vacuum Leaks Are One of the Most Common — and Sneaky — Engine Problems
Knowing how to check a vacuum leak in a car can save you from a misdiagnosis, an unnecessary repair bill, and weeks of frustrating drivability issues. Vacuum leaks are one of the most common causes of poor engine performance and bad fuel economy — and a leak as small as 0.020 inches is enough to trigger your check engine light.
Here’s how to check for a vacuum leak in your car (quick answer):
- Visual inspection — Look for cracked, collapsed, or disconnected vacuum hoses
- Listen for hissing — A hissing or sucking sound near the engine often pinpoints the leak
- Spray test — With the engine running, spray carburetor cleaner or soapy water around hoses and gaskets; a change in idle RPM reveals the leak location
- OBD-II scan — Check for lean codes (P0171, P0174) and look at fuel trim data
- Smoke test — The most reliable method: smoke is pumped into the intake system and escapes visibly at the leak point
These methods range from completely free to low-cost, and most leaks can be found without special equipment.
Vacuum leaks tend to hide in plain sight. Your car might idle rough, stall at a stoplight, or suddenly get worse gas mileage — and the cause turns out to be a $3 rubber hose with a hairline crack. The engine depends on a sealed intake system to maintain the right air-fuel balance. When outside air sneaks in through a gap or crack after the mass airflow sensor, the engine gets confused. It’s burning more air than it’s measuring, which throws off everything from idle stability to emissions.
The good news? Most vacuum leaks are diagnosable at home with basic tools — and fixable for very little money.
At Heath’s Auto Service, our certified technicians have diagnosed and repaired countless vacuum leaks across all makes and models — exactly the kind of problem that shows up when drivers search for how to check a vacuum leak in a car and aren’t sure where to start. Whether you’re tackling this yourself or want a professional to confirm your diagnosis, this guide walks you through every proven method step by step.
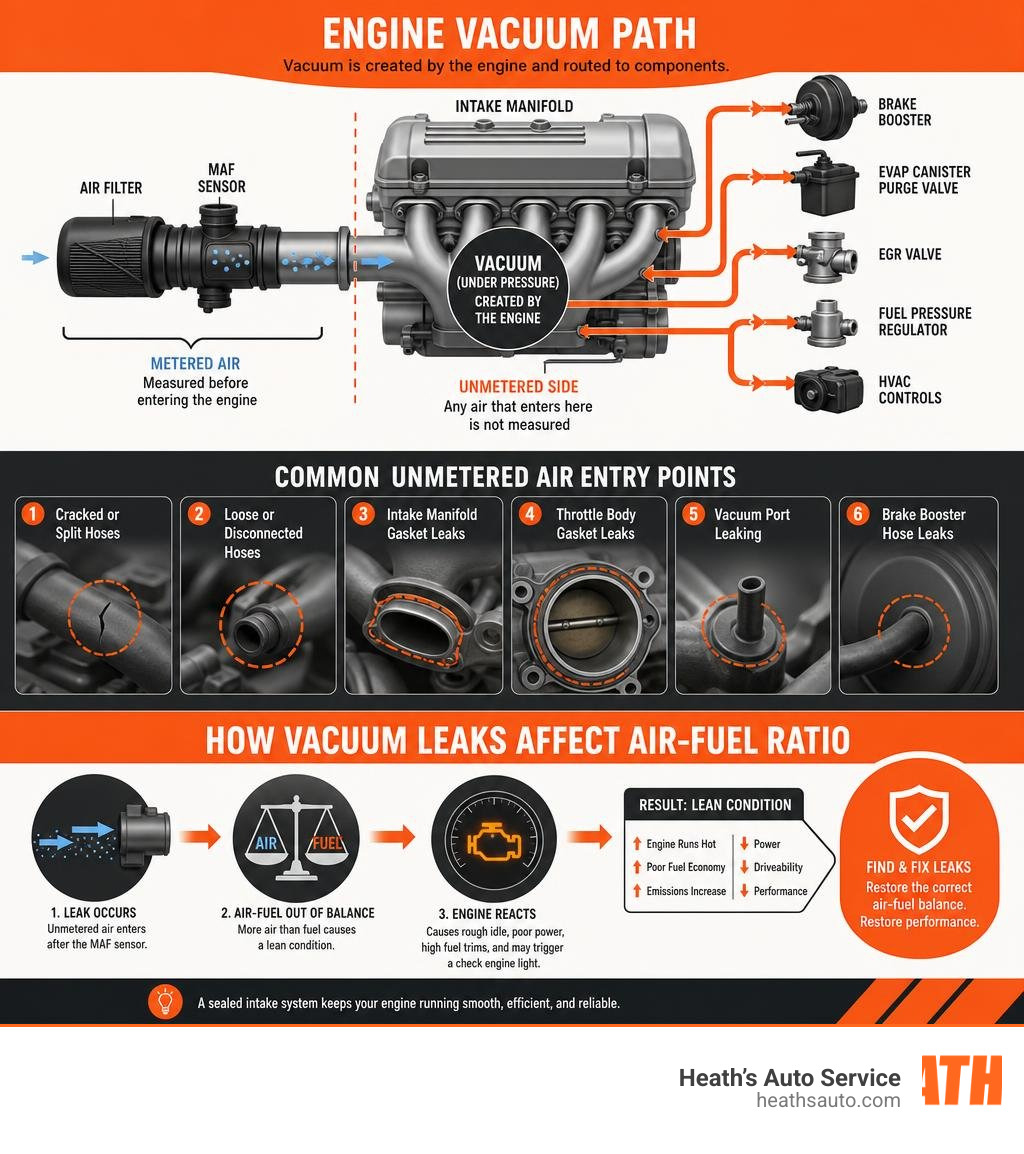
How to check vacuum leak in car terms you need:
- how to find a vacuum leak without a smoke machine
- smoke machine for car vacuum leaks
- vacuum leak repair near me
What is an Engine Vacuum Leak and Why Does It Matter?
To understand why a vacuum leak causes so much trouble, we have to look at how an internal combustion engine breathes. At its core, your engine is a massive air pump. During the intake stroke, the pistons move downward, creating a low-pressure area (a vacuum) inside the intake manifold. This negative pressure is what draws the air-fuel mixture into the combustion chambers.
For the engine to run smoothly, the computer (or Engine Control Unit/ECU) must maintain an ideal stoichiometric air-fuel ratio of 14.7:1 (14.7 parts air to 1 part fuel). The ECU measures the incoming air using a Mass Airflow (MAF) sensor or a Manifold Absolute Pressure (MAP) sensor. It then calculates the exact millisecond of fuel injector pulse-width needed to hit that perfect ratio.
A vacuum leak is unmetered air entering the engine downstream of the MAF sensor. Because this extra air enters through a crack, tear, or bad gasket, it bypasses the sensor entirely. The ECU has no idea this extra air is there until the combustion cycle is complete and the upstream oxygen sensors report a massive surplus of oxygen in the exhaust.
When this happens, the vehicle experiences a “lean” condition (too much air, too little fuel). This imbalance triggers noticeable signs of an engine vacuum leak, such as erratic idling, engine stumbling, and a sharp drop in fuel economy. To offset this unmetered air, the computer is forced to dump extra fuel into the cylinders, destroying your fuel efficiency.
As highlighted in the Popular Mechanics guide on finding vacuum leaks, modern vehicles use engine vacuum to control an amazing array of secondary systems. A tiny leak can compromise drivability, degrade overall performance, and light up your dashboard like a Christmas tree.
Common Symptoms of a Vacuum Leak
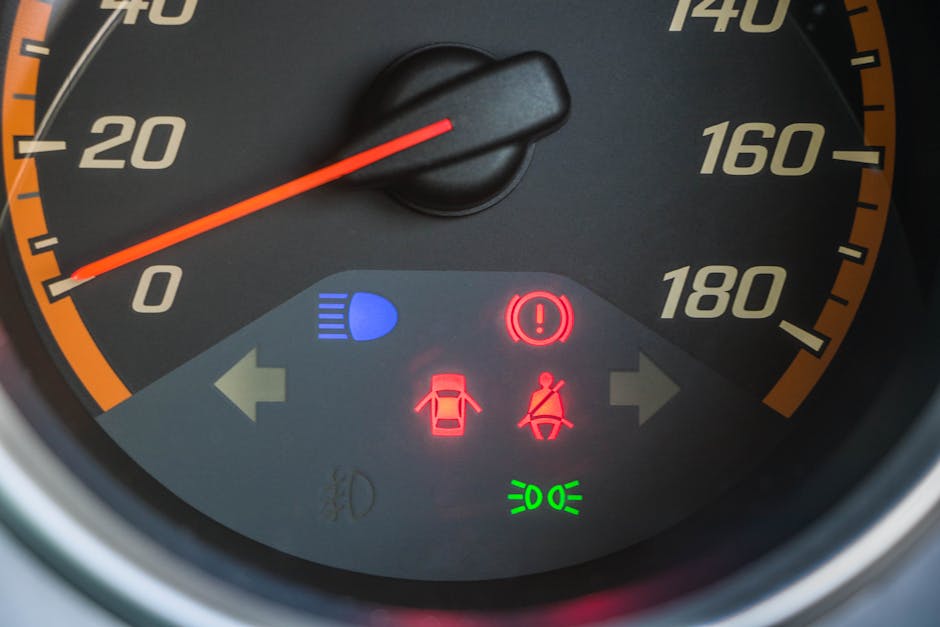
Because engine vacuum is utilized by multiple automotive systems, the symptoms of a leak can manifest in several different ways. Understanding these symptoms is crucial to diagnosing the issue before it leads to more expensive damage.
- Rough, Unstable, or High Idle: This is the classic symptom. Because a vacuum leak introduces extra air, the engine’s RPM may fluctuate wildly at idle (often called “idle hunting”). In some vehicles, particularly older models, a large vacuum leak will cause a consistently high idle (sometimes up to 1,500 RPM or more) as the engine tries to compensate for the excess air.
- Engine Hesitation and Stalling: When you press the gas pedal, the sudden change in airflow can cause the engine to stumble, hesitate, or even stall completely. This is incredibly common when coming to a stop or attempting to accelerate from a standstill.
- Hissing or Sucking Sounds: If you pop the hood while the engine is idling, you might hear a distinct hissing, whistling, or sucking sound. This is literally the sound of atmospheric air rushing through a tiny crack or hole into the high-vacuum environment of the intake manifold.
- Check Engine Light (CEL): The computer will eventually recognize that it cannot maintain the proper air-fuel ratio. This triggers diagnostic trouble codes (DTCs) like P0171 and P0174, which indicate a “System Too Lean” condition.
- Stiff Brake Pedal: Many modern vehicles use a vacuum-assisted brake booster to multiply the force you apply to the brake pedal. A leak in the booster or its supply line can cause a sudden, alarming increase in brake pedal resistance.
- HVAC Malfunctions: In some cars, the heating, ventilation, and air conditioning (HVAC) doors are controlled by vacuum actuators. If you lose vacuum, you might find that air only blows out of the defrost vents, regardless of which setting you select.
If you are experiencing any of these performance anomalies, consulting a comprehensive guide to vacuum leak car repair is the best next step to isolating the issue.
How to Check Vacuum Leak in Car: 5 Proven Diagnostic Methods
When it comes to learning how to check a vacuum leak in a car, you don’t need to jump straight to the most expensive tools. We recommend a progressive diagnostic ladder: starting with free, simple visual methods before moving on to specialized testing equipment.
| Method | Cost | Difficulty | Safety Risk | Effectiveness |
|---|---|---|---|---|
| Visual Inspection | Free | Very Easy | None | ~30% |
| Listening / Stethoscope | Free – $15 | Easy | Low | ~40% |
| Spray Test (Carb Cleaner/Soap) | $2 – $10 | Easy | Moderate (Flammable) | ~70% |
| OBD-II Fuel Trim Analysis | $20 – $100 | Moderate | None | ~80% (Confirms leak) |
| Smoke Testing | $30 – $150 | Moderate | Low | ~99% |
Safety Precautions Before You Begin
Working around a running engine carries inherent risks. Before attempting any of these diagnostic procedures, observe the following safety guidelines:
- Avoid loose clothing and jewelry: Tie back long hair and secure any loose clothing that could get caught in spinning engine belts or cooling fans.
- Use protective gear: Always wear safety glasses and mechanics’ gloves.
- Mind the fire risk: Flammable sprays like carburetor cleaner or starting fluid can ignite if they contact hot exhaust manifolds or stray electrical sparks. Keep a working fire extinguisher nearby and apply sprays in short, controlled bursts rather than a continuous stream.
- Work in a well-ventilated area: Never run your vehicle inside a closed garage. Carbon monoxide is odorless, colorless, and deadly.
Visual Inspection: The First Step in How to Check Vacuum Leak in Car
Before spending money on diagnostic tools, perform a thorough physical inspection of your engine bay. This simple step can successfully pinpoint about 30% of all vacuum leaks in under ten minutes.
- Locate the Vacuum Diagram: Look for a vacuum routing schematic label under your hood (often on the radiator shroud or underside of the hood). If it’s missing, consult your service manual or find a diagram online.
- Inspect Every Hose: Run your fingers along each rubber vacuum line. Feel for soft, mushy spots (often caused by oil saturation), brittle sections, or dry rot. Bend the hoses slightly near their connection points; hairline cracks often hide in the stress points where the hose meets a plastic fitting.
- Check Connections: Ensure every hose is firmly seated on its port. Over time, engine vibrations can wiggle old, hardened hoses right off their plastic nipples.
- Examine Plastic Junctions: T-fittings and plastic vacuum connectors are notorious for cracking as they age and cycle through extreme engine temperatures.
For a deeper dive into simple, low-cost diagnostic tricks, check out our resource on detecting engine vacuum leaks using household items to get started without buying specialized gear.
Spray Testing: Using Carb Cleaner or Soapy Water
If a visual check doesn’t reveal the culprit, the spray test is a highly effective, time-tested DIY method. It works on a simple principle: when you spray a liquid over a leak point on a running engine, the vacuum will draw that liquid into the intake manifold.
The Carburetor Cleaner Method
Carb cleaner acts as an auxiliary fuel source.
- Start the engine and let it warm up to normal operating temperature so the idle stabilizes.
- Using short, precise puffs, spray carburetor cleaner around suspected leak areas: vacuum hose connections, intake manifold gaskets, the throttle body gasket, and the PCV valve.
- Listen and watch: If the spray hits a leak, the engine will draw the flammable fluid in, causing a sudden, temporary change in engine RPM (usually a brief surge or a momentary stumble).
- Note: As noted in Family Handyman’s vacuum leak tutorial, brake cleaner can also be used as a slightly faster-evaporating alternative, but you must ensure it is non-chlorinated to avoid producing toxic gases when exposed to heat.
The Soapy Water Method (A Safer Alternative)
If you are uncomfortable spraying flammable liquids near a hot engine, soapy water is a fantastic, completely safe alternative.
- Mix water with a few drops of dish soap in a spray bottle.
- With the engine running, spray the mixture onto suspected leak points.
- Instead of an RPM change, look for the water to be sucked into the crack, or look for bubbling around the leak if the system undergoes temporary positive pressure changes.
Smoke Testing: The Gold Standard for How to Check Vacuum Leak in Car
When professional mechanics have a tough-to-find leak, they don’t waste hours spraying chemicals. They reach for a smoke machine. This is the single most reliable, accurate, and safest way to find any vacuum leak, capable of locating holes as small as 0.010 inches.
A smoke machine vaporizes mineral oil or baby oil under very low pressure (typically 0.5 to 1.0 psi) and injects it directly into the sealed intake system. Because the engine is turned off during this test, there is zero risk of fire or getting caught in moving parts.
How to Perform a Smoke Test:
- With the engine completely off, seal the main air intake. You can do this by removing the air filter box and sealing the intake duct with a plastic glove, plastic wrap, or a dedicated inflatable intake bladder.
- Locate a major vacuum port (such as the brake booster vacuum line) and disconnect it.
- Connect the nozzle of your smoke machine to this port.
- Turn on the smoke machine and allow it to pressurize the intake system.
- Grab a bright flashlight and inspect the engine bay. Look for wisps or plumes of white smoke escaping from the engine. Wherever the smoke escapes is exactly where your vacuum leak is located.
If you want to understand the exact mechanics behind this professional-grade diagnostic tool, read our complete guide on using smoke machines to pinpoint engine leaks.
Using an OBD-II Scanner and Fuel Trim Data
If you own a modern vehicle, your car’s computer is already doing most of the diagnostic heavy lifting. By connecting a basic OBD-II scan tool, you can read live data to confirm if a vacuum leak is present before you even pop the hood.
The key metrics to look at are Short-Term Fuel Trim (STFT) and Long-Term Fuel Trim (LTFT). Fuel trims are expressed as a percentage:
- 0% means the engine is running perfectly at the ideal 14.7:1 ratio without needing corrections.
- Positive values (+5% to +25%) mean the computer is adding extra fuel to compensate for a lean condition (too much air).
- Negative values (-5% to -25%) mean the computer is cutting back on fuel because the engine is running rich.
The Fuel Trim “Vacuum Leak Signature”
A classic vacuum leak has a very specific signature on a scan tool:
- Plug in your scanner and monitor STFT and LTFT at a warm idle. If your combined fuel trims (STFT + LTFT) are above +10% or +15%, your engine is running lean.
- Now, press the accelerator and hold the engine speed at roughly 2,500 RPM. Watch the fuel trim numbers.
- If the fuel trims drop back down close to 0%, you have a vacuum leak.
Why does this happen? At idle, the throttle plate is closed, creating high vacuum inside the manifold. A small crack lets in a relatively large volume of unmetered air compared to the tiny amount of air passing the idle air control valve. When you open the throttle to 2,500 RPM, the volume of metered air entering the engine increases dramatically, making the tiny amount of leaking air insignificant by comparison. The computer no longer needs to compensate heavily, so the fuel trims return to normal.
If your fuel trims remain high at 2,500 RPM, your issue is likely not a vacuum leak, but rather a weak fuel pump, clogged fuel injectors, or a failing MAF sensor.
Common Locations for Vacuum Leaks and How to Fix Them
Vacuum leaks can form anywhere between the back of the throttle plate and the intake valves. However, after years of servicing vehicles, we see the same common failure points over and over again:
- Intake Manifold Gaskets: These gaskets seal the metal or plastic intake manifold to the engine cylinder heads. Over time, they degrade from heat cycling. Certain engines, like older GM V6 platforms, are notorious for intake gasket failures. Replacing an intake manifold gasket is a more involved DIY repair but highly doable with a basic socket set and a torque wrench.
- The PCV (Positive Crankcase Ventilation) System: The PCV valve and its rubber supply hoses carry blow-by gases from the crankcase back into the intake manifold. Because these hoses are constantly exposed to hot oil vapors, they soften, swell, and eventually split open. Replacing a PCV hose is as simple as pulling off the old one and slipping on a new, oil-resistant automotive hose.
- Brake Booster Hose and Diaphragm: The thick vacuum line running from the intake manifold to the brake booster is under constant stress. If the hose cracks, or if the internal rubber diaphragm inside the booster ruptures, it creates a massive vacuum leak. You can test this by pinching off the brake booster supply hose with pliers while the engine is idling; if the rough idle suddenly smooths out, your booster or its hose is leaking.
- Throttle Body Gaskets: Located between the throttle body and the intake manifold, this gasket can dry out and crack, especially if it was disturbed during a recent throttle body cleaning.
- EGR (Exhaust Gas Recirculation) Valves: A failing EGR valve or its associated vacuum solenoid can stick open, allowing unmetered exhaust gases or air to enter the intake stream at the wrong time.
Frequently Asked Questions About Car Vacuum Leaks
Can you drive with a vacuum leak?
While your car might still drive with a minor vacuum leak, doing so for extended periods is not recommended. Running lean increases combustion chamber temperatures, which can lead to engine knocking, damaged spark plugs, and premature wear on valves. Furthermore, the excess unburned oxygen and fuel entering the exhaust stream will quickly overheat and destroy your expensive catalytic converter.
Will a vacuum leak throw a check engine light code?
Yes. Most vacuum leaks will eventually trigger a check engine light. The most common codes are P0171 (System Too Lean – Bank 1) and P0174 (System Too Lean – Bank 2). If the leak is large enough to cause severe combustion instability, you may also see random misfire codes ranging from P0300 to P0308.
How much does it cost to fix a vacuum leak?
If you diagnose and repair the leak yourself, the cost is incredibly low. A foot of replacement vacuum hose or a new PCV valve usually costs under $10 to $20.
If you take your vehicle to a professional shop, the cost typically consists of a diagnostic fee (usually 1 hour of labor, ranging from $100 to $150) to pinpoint the leak using a professional smoke machine. Once found, the repair cost depends entirely on the location. Replacing a simple vacuum hose might only cost $20 in parts and 15 minutes of labor, whereas replacing a buried intake manifold gasket can range from $300 to $800 depending on the vehicle’s complexity.
Conclusion
Finding a vacuum leak doesn’t have to be an expensive mystery. By starting with a systematic visual check, utilizing simple spray or listening tests, and leverage modern OBD-II data, you can successfully diagnose and repair the vast majority of vacuum leaks right in your own driveway.
However, if you’ve tried these methods and are still stumped, or if your leak turns out to be a complex intake manifold gasket or a failing internal component, we are here to help.
Heath’s Auto Service In Gilbert, AZ
We stand behind our work with a 3-year/36,000-mile nationwide warranty and offer free second opinions if you’ve been told you need a major repair elsewhere. Don’t spend another day melting in traffic.
At Heath’s Auto Service, our comprehensive range of services covers everything from routine maintenance to complex repairs. Our certified technicians are skilled in handling brake inspections, tire rotations, and much more. Whether it’s a minor tune-up or a major overhaul, trust us to get you back on the road with confidence. Contact our team at Heath’s Auto Service today!